Showing posts with label snacks. Show all posts

Monday, August 17, 2015

kimchi buffalo cauliflower with simple slaw


Wow well December 18, 2012 was the last time I posted a recipe on this blog. How time flies. It's close to 3 years later - how ya been?

Things are well with me. Crazy as ever. I've been cooking up a storm the past year and experimenting with lots of different things. Mainly making everything from scratch. Stock, pasta, sauces, preserves - I've been getting my inner Mormon on. It's been wonderful to get back to basics and has improved our health to no end.

We get a box from Ceres each week and I love the ways you have to experiment with using things up. We went through a time when we were getting a lot of cauliflower so here we are.

I tinkered with this original recipe but felt using 2/3 of a cup of hot sauce was such a waste of resources and an expensive ingredient. The amount of kimchi, blended, isn't an exact science but neither is a 'medium head' of cauliflower. Use your judgement if the sauce looks took thin - up it, too much - save some for a dipping sauce.

I should say this didn't go too 'crispy' for me. It was more like sauce covered wings. Still delicious though.

kimchi buffalo cauliflower
1 medium head cauliflower, chopped into bite-size pieces
1/2 cup of chickpea flower
1/2 cup of water
1 tsp of garlic powder
1/2 tsp of salt
1/4 cup of hot sauce
3/4 cup of vegan kimchi

method
1. Preheat oven to 230 degrees celcius

2. Mix chickpea flour and water to create a batter.  Toss cauliflower in batter, get a good coating on it.

3. Bake cauliflower bites in the oven on a non stick pan - tossing half way through to roast evenly. Repeat battering and roasting process if you would like an even fluffier batter.

4. Toss roasted cauliflower in the hot sauce mix. Bake on baking sheet for 25 minutes. Serve with celery sticks and veganaise.


simple slaw
1 half head of cabbage, shredded (you can use a mixture of cabbages)
2 carrots, shredded
1 tbsp olive oil
1 tbsp lemon juice
pinch salt

method
1. Toss ingredients together. Use additional seasoning to taste.

Tuesday, October 16, 2012

jumbo chilli dip

Photobucket

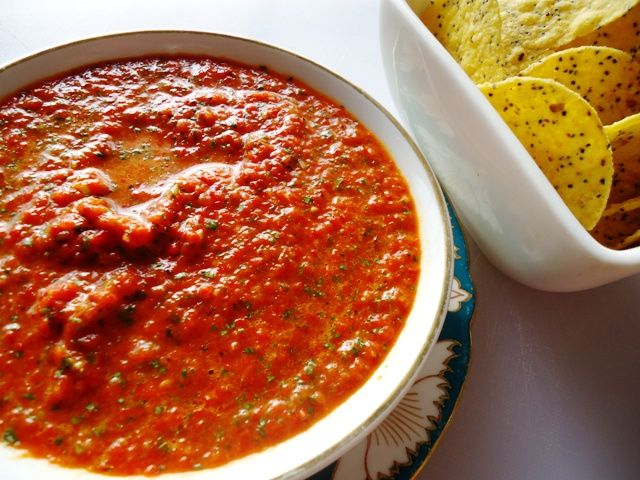
This is my first Nigella recipe! I've always loved her presence but have never watched her tv show until recently (I just assumed that I wouldn't be able to handle the meat imagery). The shows I've seen haven't been too full on - she always cooks one dessert and vegetarian offering so I can get around it.

This is EASY AS. Though I did find it's missing something, it's missing a bit of weight. I think next time I make it I'm going to add half a cup of pine nuts. It's really lovely and refreshing on a hot day.

I'm making tacos this week and think this will be a perfect hot sauce for them. I'm also thinking a little dark rum wouldn't go astray and you could use it as a marinade.

recipe from Nigella - Kitchen (Devilishly Good episode) can't find recipe published on web

ingredients
1 500gm jar of roasted capsicum (drained and rinsed)
3 birds eye chillis
1 lime (juice and zest)
2 garlic cloves
3/4 bunch of coriander (including stalks)
big pinch of salt
90 mls of neutral oil

method
1. WHIZZ!

Thursday, June 14, 2012

daifuku mochi

Photobucket

I'm obsessed with mochi. No really. Not overly sweet it comes in an amazing array of flavours and is gluten free, vegan perfection. I've had a bag of glutinous rice flour sitting in my cupboard for a YEAR and finally got around to it on the weekend. James and Matt finally pushed me over the edge a few months ago with their extensive post, I'm also clearing out all the ingredients I've been hoarding (I'm a serious hoarder) it was time, mochi time.

I'll be straight up and say I don't have a microwave which has always put me off but thanks to Chocolate and Zucchinis post with instructions for a steamer AND a rice cooker I was able to give it a go (there is talk elsewhere on the interwebs that mixing the dough with boiling water might be sufficient).

Ok so what I would do differently next time. Firstly I "scraped down the sides" of the rice cooker a little bit too much, I wouldn't touch it at all next time, it made the dough go a bit lumpy as you can see. Secondly I would take James and Matts advice and have a shaped, hard filling to wrap the mochi around. I had wet red bean paste and it was really difficult keeping it in. Other than that this was ridiculously easy. I doubled the recipe because I wanted a mountain of mochi.

ingredients from Chocolate and Zucchini - watch the video embedded in the post too

filling for your mochi, I used red bean paste - this you will have to experiment with (recipe says 240gms)
200 gms glutinous rice flour
1/2 cup of sugar
1 1/3 cup of water
potato starch or corn starch for dusting (A LOT)

method (for a rice cooker)
1. Put the flour, sugar and water in your rice cooker and stir to combine. Cook for about 10 minutes, mixture should be thick and slightly translucent.

2. On a baking sheet lay down a thick dusting of starch. When the dough is cooked pour it onto the starch , sprinkle with a load of starch and (with floured hands) pat out the dough to about 2cm thick (shit is STICKY and HOT so be careful).

3. Slice up as best you can into a grid making 6-9 squares (I dipped a chefs knife in potato starch each slice). Work quickly because the dough is easiest when hot, dust off the starch on the filling side, put your filling in the middle and bring up the sides squeezing them together. You can then roll them around in your palm a bit to get a more uniform look.

4. Once all the mochi is made leave to cool down for about an hour. Put all the potato starch into a container for your next batch and then store the mochis at room temp in an airtight container. NOM.

Wednesday, November 16, 2011

pastizzis

Photobucket

I finally rolled of my butt to make the staple Maltese food PASTIZZIS! I was *supposed* to make them for a Byzantine themed bbq on Saturday but after Boozy McFalldown went on the rampage it kind of blew my day out (not kind of - entirely). BUT! I had all the ingredients and once my raging hang over had misted slightly I was craving GREASE. That's how easy these are to make, I made them so revoltingly hung over I could barely stand.

You have to trust me sans cross section that both kinds are in there but I made the traditional curried pea and spinach/ricotta. There's only 3 in that plate for a few reasons:

1. I ate almost everything that came withing reach
2. I found it difficult to get the hang of folding them, these were the final 3 that looked ok

ingredients
1 package of defrosted puff pastry (Borgs brand for authenticity)

curried pea filling
(recipe from Taste.com.au)
yields 8 large pastizzis

175g dried green split peas
1 tablespoon olive oil
1 small brown onion, finely chopped
2 garlic cloves, crushed
3 teaspoons mild curry powder
1/2 tsp of salt

1. Rinse peas, pick out any wonky looking ones and cover with cold water in a saucepan. Bring to the boil over high heat then reduce to simmer uncovered, for 30 minutes or until tender. I found I had to top up the water a couple of times so keep an eye on it.

2. In a bit of oil fry up onion and garlic until softened then add curry powder. Combine well then add the peas and 1/4 cup cold water. Cook on medium heat until liquid has evaporated. At this point it just looks like a bunch of split peas and onion, when they cook in the pastry they soften down to that puree you're familiar with.

spinach ricotta filling (recipe from The Voluptuous Vegan)
yields 8 large pastizzis

300 gm of tofu (silken)
1 tbsp of olive oil
2 tbsp fresh lemon juice
1/2 tsp salt
1 tsp of light miso paste
handful of steamed spinach (or I used 1/4 block of frozen)

1. Whizz the mixture in a food processor. Voila. (I actually mashed with a spoon)

assemble
1. Preheat oven to 220°C (200°C fan-forced).

2. Cut frozen pastry sheet into 4 squares. Blob about a tablespoon of your mixture in the middle, you'll learn how much is enough quite quickly. I then pinched the ends (pointy part of pastizzi) and then sealed it by rolling over the pastry on top of each other at the seam. You'll get the hang of it. Spray with a bit of cooking oil or brush with soy milk.

3. Bake for 20/25 minutes until golden.

notes: I'm still having the water release issues from the tofu ricotta (probably because I did nothing to try and change it this time) I still think if you cook the tofu mixture in a saucepan until it releases all that water and drain it off that will fix it. Will keep you updated, till then either try that method or have soggy bottomed tofu ricotta pastizzis.

Tuesday, August 23, 2011

dr tempehcon - or I how I stopped wretching and learned to love the tempeh

Photobucket

Ahhh "tempeh-con". I have to admit I've abhorred tempeh until now. The only time I'd eaten tempeh and liked it was at Real Food Daily in their burger. It's a texture thing, it's a taste thing, it's an all over tempeh you are seriously gross thing. But something came over me. I just became obsessed with recreating the tempeh bacon from Real Food Daily and although I couldn't be bothered making my own stove stop smoker or finding maple crystals I thought DAMN IT I can find a recipe that works. From there an addiction was born. Rummaging around the web the general consensus was maple syrup, soy sauce, liquid smoke. The cooking methods varied but the main method was slice thinly and pan fry. I then found this wonderful amazing woman Colleen Patrick Goudreau and tried the recipe in this video:


What I took away from this stuck, STEAM THE TEMPEH, it makes it completely amazing and like a sponge even eager to soak up the marinade. I can (and have) eaten a whole packet at once. It's seriously good, a little lengthy to get it crispy but OH so worth it.

ingredients
1 packet of tempeh, pat dry and slice thinly (bearing in mind it plumps up when steamed)
1/4 cup of soy sauce/tamari
1/4 cup of maple syrup
1 tbsp of liquid smoke

method
1. Steam the tempeh slices for 8-10 minutes in vegie steamer. The tempeh will go a whiteish colour.

2. Mix up the marinade and soack the tempeh strips (I usually just line them up like before they were sliced and wedge them into a lunchbox) over night if possible.

3. Line up the tempeh strips on a wire rack and drain the marinade off then line the little soldiers up on a baking sheet and grill the shit out of them at 200 degrees (or high). I do 10 minutes each side, twice. That gets them real crispy, so good you feel like you're going to die.

4. Slather some toast with mustard and avocado and you have yourself a breakfast of champions.

notes: my grill is crap, keep an eye on the tempeh, most people need half the time

Wednesday, July 20, 2011

tahini balls

Photobucket

I am currently obsessed with tahini I drizzle it on everything. Tahini on toast with sunflower seeds and LSA is my favourite breakky in the world! I've been trying to incorporate more raw foods into my diet lately and after meeting Miss Organic at the first shoe party I started looking at her website and of course this recipe caught my eye! These are SO delicious and SO filling! I pack 3 for a snack when I'm at work, they have replaced chocolate for me (which is a good thing). Quick and easy, I store them in a air tight container in the fridge. Nom nom.

Recipe from the Miss Organic Website

Ingredients
1/2 cup tahini
3/8 cup raw agave syrup*
1/2 cup dessicated coconut
1/2 cup mixed pre-soaked chopped nuts (e.g. macadamias, almonds, brazil nuts)*
1 cup finely chopped mixed dried fruits (e.g. apricots, figs, currants)

method
1. Pulse in a food processor until combined. Roll into walnut size balls and toss lightly in coconut.

notes: I used 1 1/2 cups of raw trail mix. If you cant find raw agave syrup, I'm sure maple would work just as well.

Thursday, October 14, 2010

corn fritters

Photobucket

There is just something about putting something in batter and frying it on a griddle. As you're all aware I've been travelling TONNES this year, there's something about turning 30 that makes you break your back in trying to get quite a few things ticked off before you turn 31. So most of my cooking lately has been about using up whatever food is in my fridge, what I can freeze etc, wasting food is the worst thing in the WHOLE WORLD to me. So these were knocked up quickly but what a deeeeelight. Enjoy.

Makes 1-2 servings

Ingredients

1 tbsp of besan (chickpea flour)
1 tbsp of flour
4 tbsp of water
2 large fresh corn cobs with the kernels cut off
a grind of fresh salt and pepper

1. Mix the flour and water until the batter is smooth and of a pancake consistency (you might have to add some more water). Add the corn kernals and combine well.

2. Heat a heavy bottom fry pan on high (or just regular pan but on a medium heat) and wait until the pan is quite hot (a few drops of water should sizzle when dripped onto the surface). Carefully ladle in mixture to form a couple of fritters. Only flip when completely cooked and browned on the first side (like a pancake, the mixture on the top is almost completely cooked before you flip it over).

3. Smear with vegan mayo and relish of some kind (I used green tomato relish - mm yum!)

Notes: You can you plain flour instead of chickpea, you may just need less water. I used white flour but whole wheat would be nice too. You can you plain flour instead of chickpea, you may just need less water. I used white flour but whole wheat would be nice too.

Tuesday, September 21, 2010

a simple salad

Photobucket

A salvaged disaster. I was going for this asian smoky eggplant salad but I really disliked the dressing and remembered I dont really like eggplant! (beyond babaganoush and nasu dengaku).

But what was left was delicious. Shredded cucumber (look at me! eating cucumber!), carrot, avocado, cashews, toasted pine nuts, spanish onion, mint, dressed lightly with olive oil and balsamic. I was super pissed at the failed recipe but became happier and happier as I munched into this salad. You forget how delicious and amazing fresh, raw, organic vegies can really be.

Tuesday, August 24, 2010

stuffed artichokes -qaqoċċ mimli

Photobucket

or in Maltese - Qaqoċċ mimli

I was lucky enough to be able to borrow quite a few Maltese cookbooks from co-op leader extraordinaire Margarita (she is Maltese also). Maltese cookbooks are hard to find!! So expect quite a few Maltese recipes filtering through! Artichokes are just about to go out of season so get to the markets quickly. This was my first time cooking them and I have to admit I was a little daunted but it was super easy and worked out SO DELCIOUSLY.

ingredients
4 globe artichokes
2 cups of stale bread (around 6 slices, crusts trimmed), sourdough if possible
2 tbsp of capers
4 cloves of garlic, sliced
2-4 tbsp of flat leaf parsley
1/2 cup of olives (preferably green)
2 tbsp olive oil
fresh lemon juice
salt

added extras/ideas:
fresh chilli
lemon zest

method
1. Cut the stalks off the artichokes about 1 cm from the base. Trim the outer leaves off altogether (around 2 levels of leaves) and slice the top off altogether so it removes the tips of most of the leaves (about 2 cm). Trim the hard stalky tips of the outer leaves that didnt get trimmed when you topped the head off.

2.Squeeze a lemon over the top of the artichokes and soak in some salty water (I just did this in the sink, make sure you clean it thoroughly first!) for about half an hour.

3. comes the fun part! Holding the artichoke like a baseball bash it onto the kitchen bench quite hard, rotating it in your hand after each hit until you've done the full 360 degrees. This loosens the globe to enable stuffing the leaves. Gently stick your fingers in between each layer to slowly open up the artichoke like a flowering rose. Now you are ready for your stuffing.

4. To make the stuffing tear the bread into small pieces and throw into a food processor. Add the olive oil, capers, olives, garlic and parsley (and whatever other flavourings you are adding) and pulse a couple of times until it is 'roughly chopped' Grab handfuls and stuff into each layer of the artichokes until they are full.

5. Steam them (I used my rice cooker!) in a steamer (packed in as tightly as possible) for about an hour or until one of the outer leaves falls out easily when pulled. Cut in half, drizzle with some olive oil, lemon juice and salt and ENJOY.

notes: The heart is fully edible but as you go out the leaves become less edible. In Malta you do not wasted anything, there is flesh on the outer leaves you just have to suck on them like getting an olive away from its pit.

A fair bit of work but SO DELICIOUS. Enjoy.

Wednesday, August 4, 2010

vegan sausage rolls

Photobucket

People foam at the mouth at the announcement that Cindy and Michael have brought their "sausage rolls" to potluck. They are so coveted that I have NEVER been able to manage to get a sample before they are all gone (yeah slow poke, too busy stuffing myself with something else no doubt). So on the weekend I decided to make some (its sausage roll weather no?) and also a good snack to pack for MIFF. I did pretty much ALL substitution as I didn't have ANY of the ingredients on hand, but these turned out UH-MAZING. The original recipe is here.

ingredients
125g pinenuts, toasted
1 onion, diced
1/2 cup of cooked bulghur (I cooked in vegie stock)
1/2 cup of cooked lentils (again in vegie stock)
1/4 cup rolled oats
1 teaspoon garlic powder
3 tablespoons soy sauce
fresh parsley, chopped (to taste)
1 tbsp of liquid smoke
salt and pepper, to taste
3-4 frozen puff pastry sheets, defrosted
non dairy milk or olive oil spray to brush pastry

method
1. Preheat oven to 200 degrees.

2. Pulse the ingredients in a food processor until it resembles sausage mince. Place sausage shape amount of filling along the width end of a piece of pastry and roll tightly (spraying the pastry with olive oil spray along the way so it 'seals' together when rolled over). Pack the ends with mince, you might need the end of a wooden spoon or something to get it all in there.

3. Bake for about 15-20 minutes or until golden brown. Seriously, its that easy.

notes: Always keep pastry damp, defrost in the packet and don't open until you're ready to use it. If it is already open, put a damp, clean tea towel over the top. If you dont have liquid smoke GET SOME or a sprinkle of smoked paprika would be amazing. My oven is MUNTED, there is only 'low' or 'high' so my temps are always a bit generic you guys are smart enough to figure this all out though.

Thursday, June 24, 2010

white bean dip - bigilla

Photobucket

I cant believe I've been doing this blog for over a year and I haven't brought a Maltese dish to the table yet. I cant eat chickpeas on the blood type diet so I've been looking for a hummous substitute and eventually thought of Bigilla! Maltese white bean dip, full of protein, low in fat and so delicious. I can eat this at any time of the day (I had it on buckwheat crispbreads this morning for breakfast) and its really quick and simple to make.

ingredients
2 cans of white beans (drained and rinsed)
3 cloves of garlic, minced
1 tbsp of fresh parsley, chopped
salt
juice of one lemon (or 1-2 tbsp depends on how lemony your lemons are)
fresh chilli or chilli flakes (I used chilli oil)
A glug of olive oil to loosen it up

method
1. Mash with a fork or masher.

notes: I like tonnes of garlic, if this is not your thing of course use less! I usually use cannelini beans, but butter are also good, broad beans are traditional)

Tuesday, April 20, 2010

zucchini fritters

Photobucket

I just winged this recipe, a combination of a couple from Veganomicon. The mixture was almost like pancake batter which I then pretty much cooked just like a pancake. They were super yummy!

ingredients
2 zucchinis - grated
1/4 cup of chutney
1 tsp of tomato paste
1/2 cup of flour
1 small onion diced
1 clove of garlic - minced
salt
pepper

method
1. Combine. Heat a pan with a thin layer of oil on medium heat. Scoop with a ladle into pan and thin out the surface of fritter so it resembles a thick pancake. Flip when brown.

note: I served with Nanna Pats tomato relish and rocket pesto. This would rock with some grated Cheezly in it as well, you could also add some corn!

Monday, December 7, 2009

mediterranean breakfast beans

Photobucket

This is my usual red sauce recipe, with beans but here it is again.

ingredients
1 can of diced tomatoes
1 tbsp of tomato paste
1 small onion, diced
1 can of butter beans, drained and rinsed
1 glug of balsamic
1 small handful of basil leaves chopped
1 tsp of fresh oregano
salt and pepper to taste
1 small chili, slice
3 cloves of garlic sliced

method
1. Saute the garlic and onion until onion becomes translucent.

2. Throw in the herbs and chili and saute for a minute, then combine the tomato paste.

3. Add the remainding ingredients and simmer for about 5 minutes until combined and flavourful, season to taste. Voila!

notes: They get better over the next couple of days.

Friday, December 4, 2009

grilled asparagus

Photobucket

This was unsurprisingly really tasty. Asparagus is in season and bountiful right now, snap it up!

Recipe from Vegan Brunch.

ingredients
1/4 cup of olive oil
1/4 balsamic vinegar
salt and pepper to taste (a tsp each)
2-3 garlic cloves minced

method
1. I used 2 bunches of asparagus. Try and pick bunches that look really fresh and have soft stalks (the stalks go wooden and white if they are old). Trim the ends off the aspargus until the knife goes through easily (like cutting broccoli). I sealed in a water tight container and shook around. Refrigerate overnight or at least an hour. Grill, turning once.

Thursday, October 15, 2009

sweet potato latkes with dill sour cream

Photobucket
Photobucket

Again apologies for the crap pic, I really need to sort out lighting in my flat. Ok this recipe is really super easy.

ingredients
1x large sweet potato
1x tbsp olive oil
1 x tbsp flour
salt and pepper
0live oil for shallow frying

If you don’t have a food processor get one. I got mine for $50 on ebay and its changed my entire existence in the kitchen. I shredded the sweet potato finely, added the flour/oil/salt and pepper and mix well. The mixture should be wet enough to mould into patties and press down firmly into a heavy bottom pan with a thin layer of hot olive oil (make sure the oil is HOT!). Don’t flip until very very brown! They are hard to keep together, but add a bit more flour if you think you need it to the mixture. Drain on paper towel.

Sprinkle sea salt and pepper on them and serve with a dollop of dill tofu sour cream.

Tuesday, October 6, 2009

lentil walnut pate with tofu sour cream

Photobucket

Photobucket

Hi everyone! Sorry for the lack of posting, I've been at wedding-arama in Sydney since Wednesday. I was so hungover yesterday I felt like I had bone cancer. The good news however is, I have a BACKLOG of posts to share with you. It also means I've missed out on the first 2 days of Vegan Mofo, but I'll make it up with posts this weekend!

Now onto food goodness! (Sorry for the crap photo too, I need to figure out night lighting in my house).

lentil walnut pate (from the Real Food Daily book)

This pate takes a bit of time but its SO worth it and SO impressive to your dinner guests. I figure the best way to make people consider veganism is to woo them with outstanding food!

ingredients
3/4 dried lentils (or a can of cooked lentils, rinsed)
3 cups of water
1 bay leaf
2 tbsp olive oil
6 cloves of garlic, coarsely chopped
1 small onion diced
1 tbsp of mirin
1 1/4 cup of walnuts, toasted
1/3 cup of fresh basil
3 tbsp of yellow miso
1 1/2 tbsp of umeboshi paste
1 tbsp of fresh thyme
3/4 tsp of freshly ground black pepper

Serve with tofu sour cream (recipe to come)

method
Firstly a word about the ingredients, you will find umeboshi paste or plums (umeboshi are brined Japanese plums about the size of a giant grape) at any asian supermaket with a decent Japanese food section (the one near Queen Vic markets is rad, but the one in Barkley is cheaper), if you cant find the paste I just measure out as many plums into a tbsp (remember to pit them first!), as for the miso I have used all kinds of different misos in this and its always turned out well, from barley miso to white miso, you just need a light coloured miso. Ive also made it with dry herbs instead of fresh, use 1 tsp of dried to 1bsp of fresh.

1. (Skip this step if you are using canned lentils) Cook the lentils with the bay leaf and water until tender, drain then rinse and remove bay leaf.

2. In a fry pan, cook the onion and garlic in the olive oil until golden brown, stir in the mirin then take off the heat and cool.

3. Chop the walnuts in a food processor until it forms a paste and blend in the lentils and onion mixture. Then combine the remaining ingredients - umeboshi paste, basil, miso, lentils, and thyme, whizz until completely combined.

dill tofu sour cream
1 packet of Japanese silken tofu*
1 tsp of sushi seasoning
1 tsp of mirin
1/3 tsp of dry mustard or dijon
1/4 clove of garlic, minced
2 tsp of olive oil
1 tsp of dill (optional)

method
1. Gently remove tofu from its package and place into a container of fresh water. Run the tap over it slowly until the water runs clear (about 3 minutes).
2. Drain the tofu and whizz all the ingredients in a food processor (I've also used a stick blender with success) until smooth. Season to taste.

notes: The sour cream keeps up to a week, just stir through any released water before serving. You can flavour it to suit any dish just add some hot sauce, lemon juice, thyme – any herb. Japanese silken tofu can sometimes be found in the fresh tofu section but Morinaga (brand) tofu is the best. You can find Morinaga in the Asian food section in a juice box type container. Firm or soft I can’t tell the difference, both make great sour cream.

Tuesday, September 29, 2009

mushrooms on toast

Photobucket

Drunk. I caught the last 55 tram home to Union Square silently chanting for hot chips. Boo! No! Chastising myself I thought, I'm an industrious young lass, surely I can knock something greasy up, myself when I get home. Yes, bring on mushrooms on toast.

ingredients
olive oil
2x large mushys
2x cloves of garlijavascript:void(0)c thinly sliced
handful of sundried tomatoes or cherry tomatoes
tsp of dried thyme or fresh
fresh or dried chilli to taste
salt/pepper
handful of greens like spinach or rocket(arugula)

method
1. Fry up! I served on sourdough with a drizzle of olive oil and salt. I inhaled it so quickly I almost choked to death. Total. Win.

Wednesday, September 23, 2009

handful salad

Photobucket

I love this salad, its quick and easy, tasty and gets better the longer you have it in the fridge! I call it handful salad because I use a handful (or two) of whats lying around.

ingredients
1/2 cup cous cous
1/2 boiled water
1 tbsp of oil
handful of fresh flat leaf parsley (I just snip in with scissors)
handful of fresh mint (I just snip in with scissors)
handful or two of sultanas
handful or two of dried cranberries
handful or two of chopped almonds
handful or two of sliced sundried tomatoes

method

1. Put the cous cous, oil and boiling water into a bowl and let sit for a few minutes.

2. Fluff the cous cous then throw in all the ingredients and toss. Salad is better left overnight as the sultanas and the cranberries plump up with the moisture from the cous cous.

notes: I love the sultanas and cranberries, creating the perfect blend of sweet and tart. Also most of these items sit in jars in my cupboard so its a quick and easy meal if you cant be bothered going to the shops.
Related Posts Plugin for WordPress, Blogger...